

How To Scale Up A Drawing Without A Grid
Icons are a crucial role of whatever design system or product experience. Icons help united states quickly navigate. They are language-independent. And best of all: they're existent tiny, so they don't take upward very much real estate. Icons are a fundamental part of a good design arrangement and are very helpful for marketing materials. They're the foundational edifice block of illustrated content, but they are also highly technical.
At that place aren't many people who love to design icons, and even fewer who are great at information technology. I wrote this guide to assistance you go one of those people.
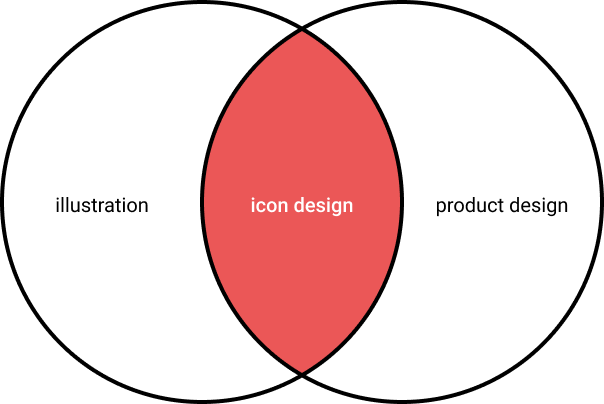
Whether you are a pattern systems expert, an illustrator, or a product designer, this guide will assist you larn how to build icons, how to align them with your brand, and how to implement them into your design organisation. Let'due south commencement with the basics.
Basic elements of an icon
Size
Consistency is key with icons, and all your icons should be the aforementioned size when you build them. First, you'll need to make sure that you lot know how your grid is built (multiple of 8 or x?). From there, your base icon size should chronicle directly to that. So, if you lot have a grid based on 8s, you'd want to build at 16, 24, or 32.
Choose a mutual size to build all your icons to, and then allow your engineers to scale to other sizes that might exist needed past other designers. You don't want to build the same icon over and over at a multitude of sizes.
When you need glyph complexity, that's when you want to start adding sizes. You might have your base product icon at 24px, but marketing icons at 80px because of the vast difference in use. Y'all'll desire to add detail for those larger sizes.
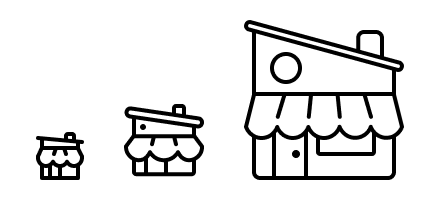
When edifice the same icon at different sizes, I like to start with the largest size and go down. I discover it much easier to remove details and simplify, rather than adding as I get upwardly. It as well gives you a sense of the object earlier y'all truly minimize it.
Color
For production icons, use 1 color: black. Anything more than that and your components are going to become too complex and hard for other designers to leverage. For marketing icons, you might want to employ 2 colors if information technology is a crucial role of your brand, but I personally believe icons should exist a single color. Anything with three or more colors is an illustration, non an icon.

Grids
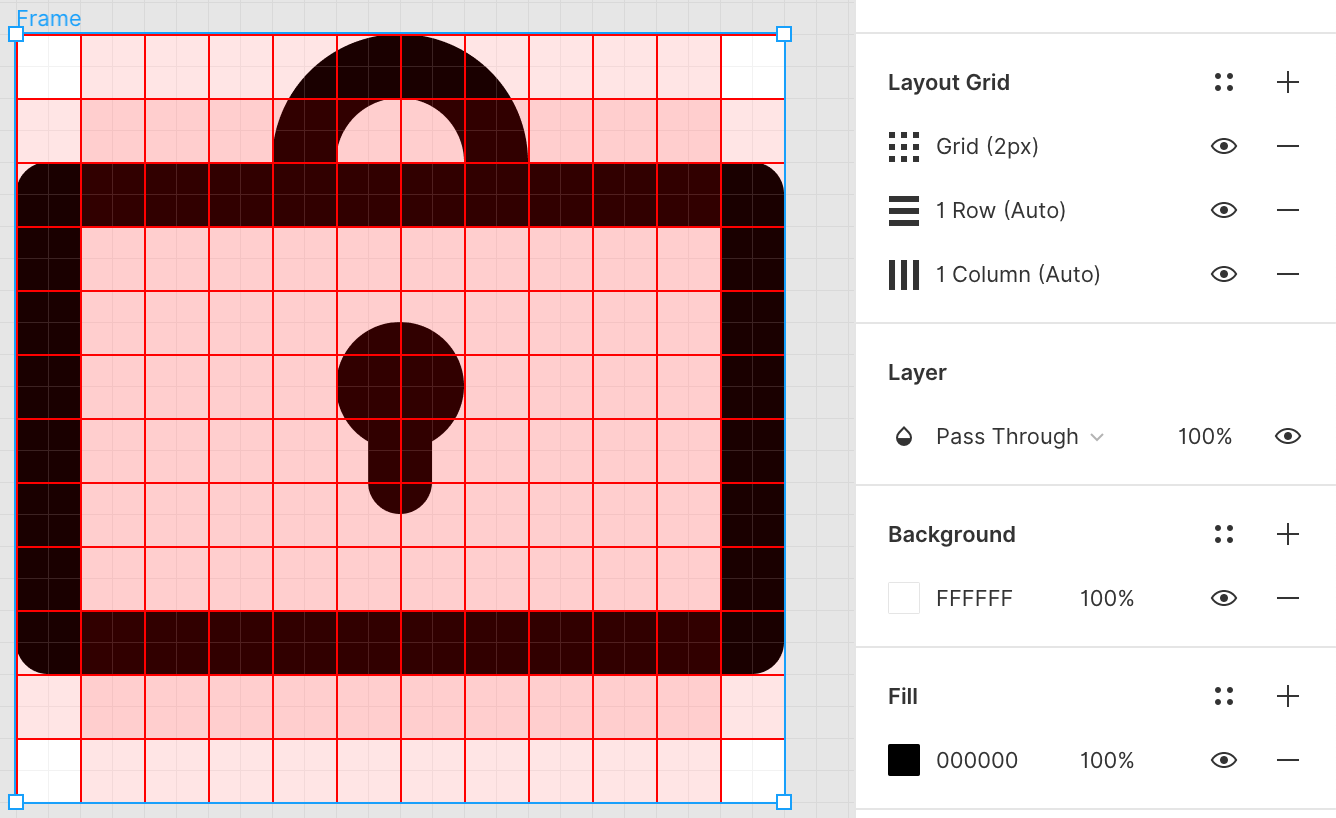
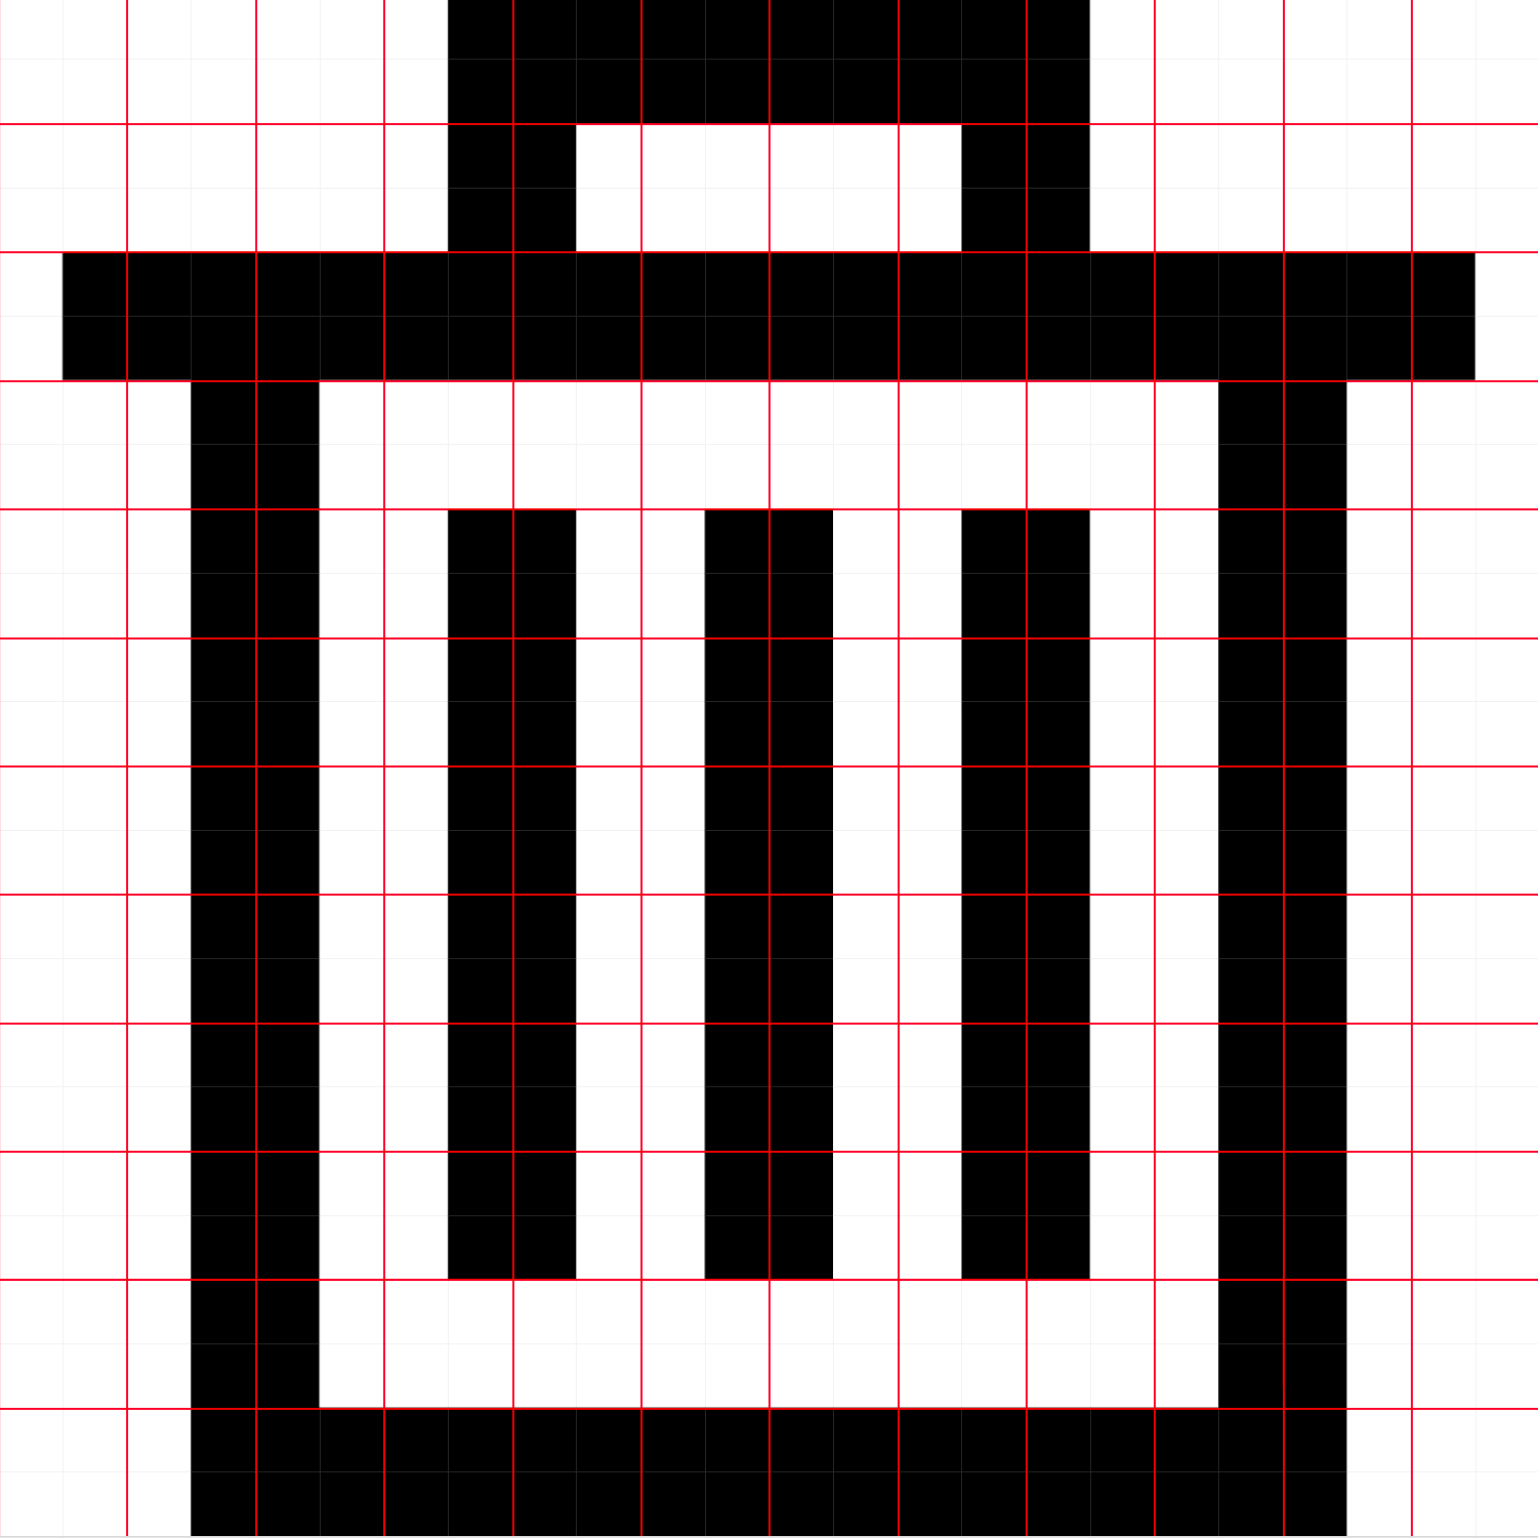
The pixel grid is the fundamental grid that uses the smallest increase: a pixel. When building icons, you always want to marshal objects to the pixel grid, especially straight lines. Merely, yous can build other shapes on the pixel grid (and if you're using Figma, y'all already are automatically). You want to build things on the pixel grid, not just because it volition render more nicely, but because information technology makes your life easier. Spacing things evenly is much easier when you're using a grid. It helps you stay consistent with your placement, and overall volition make your icons look improve. You can easily meet in Figma the difference betwixt something being 'on-pixel' and off.
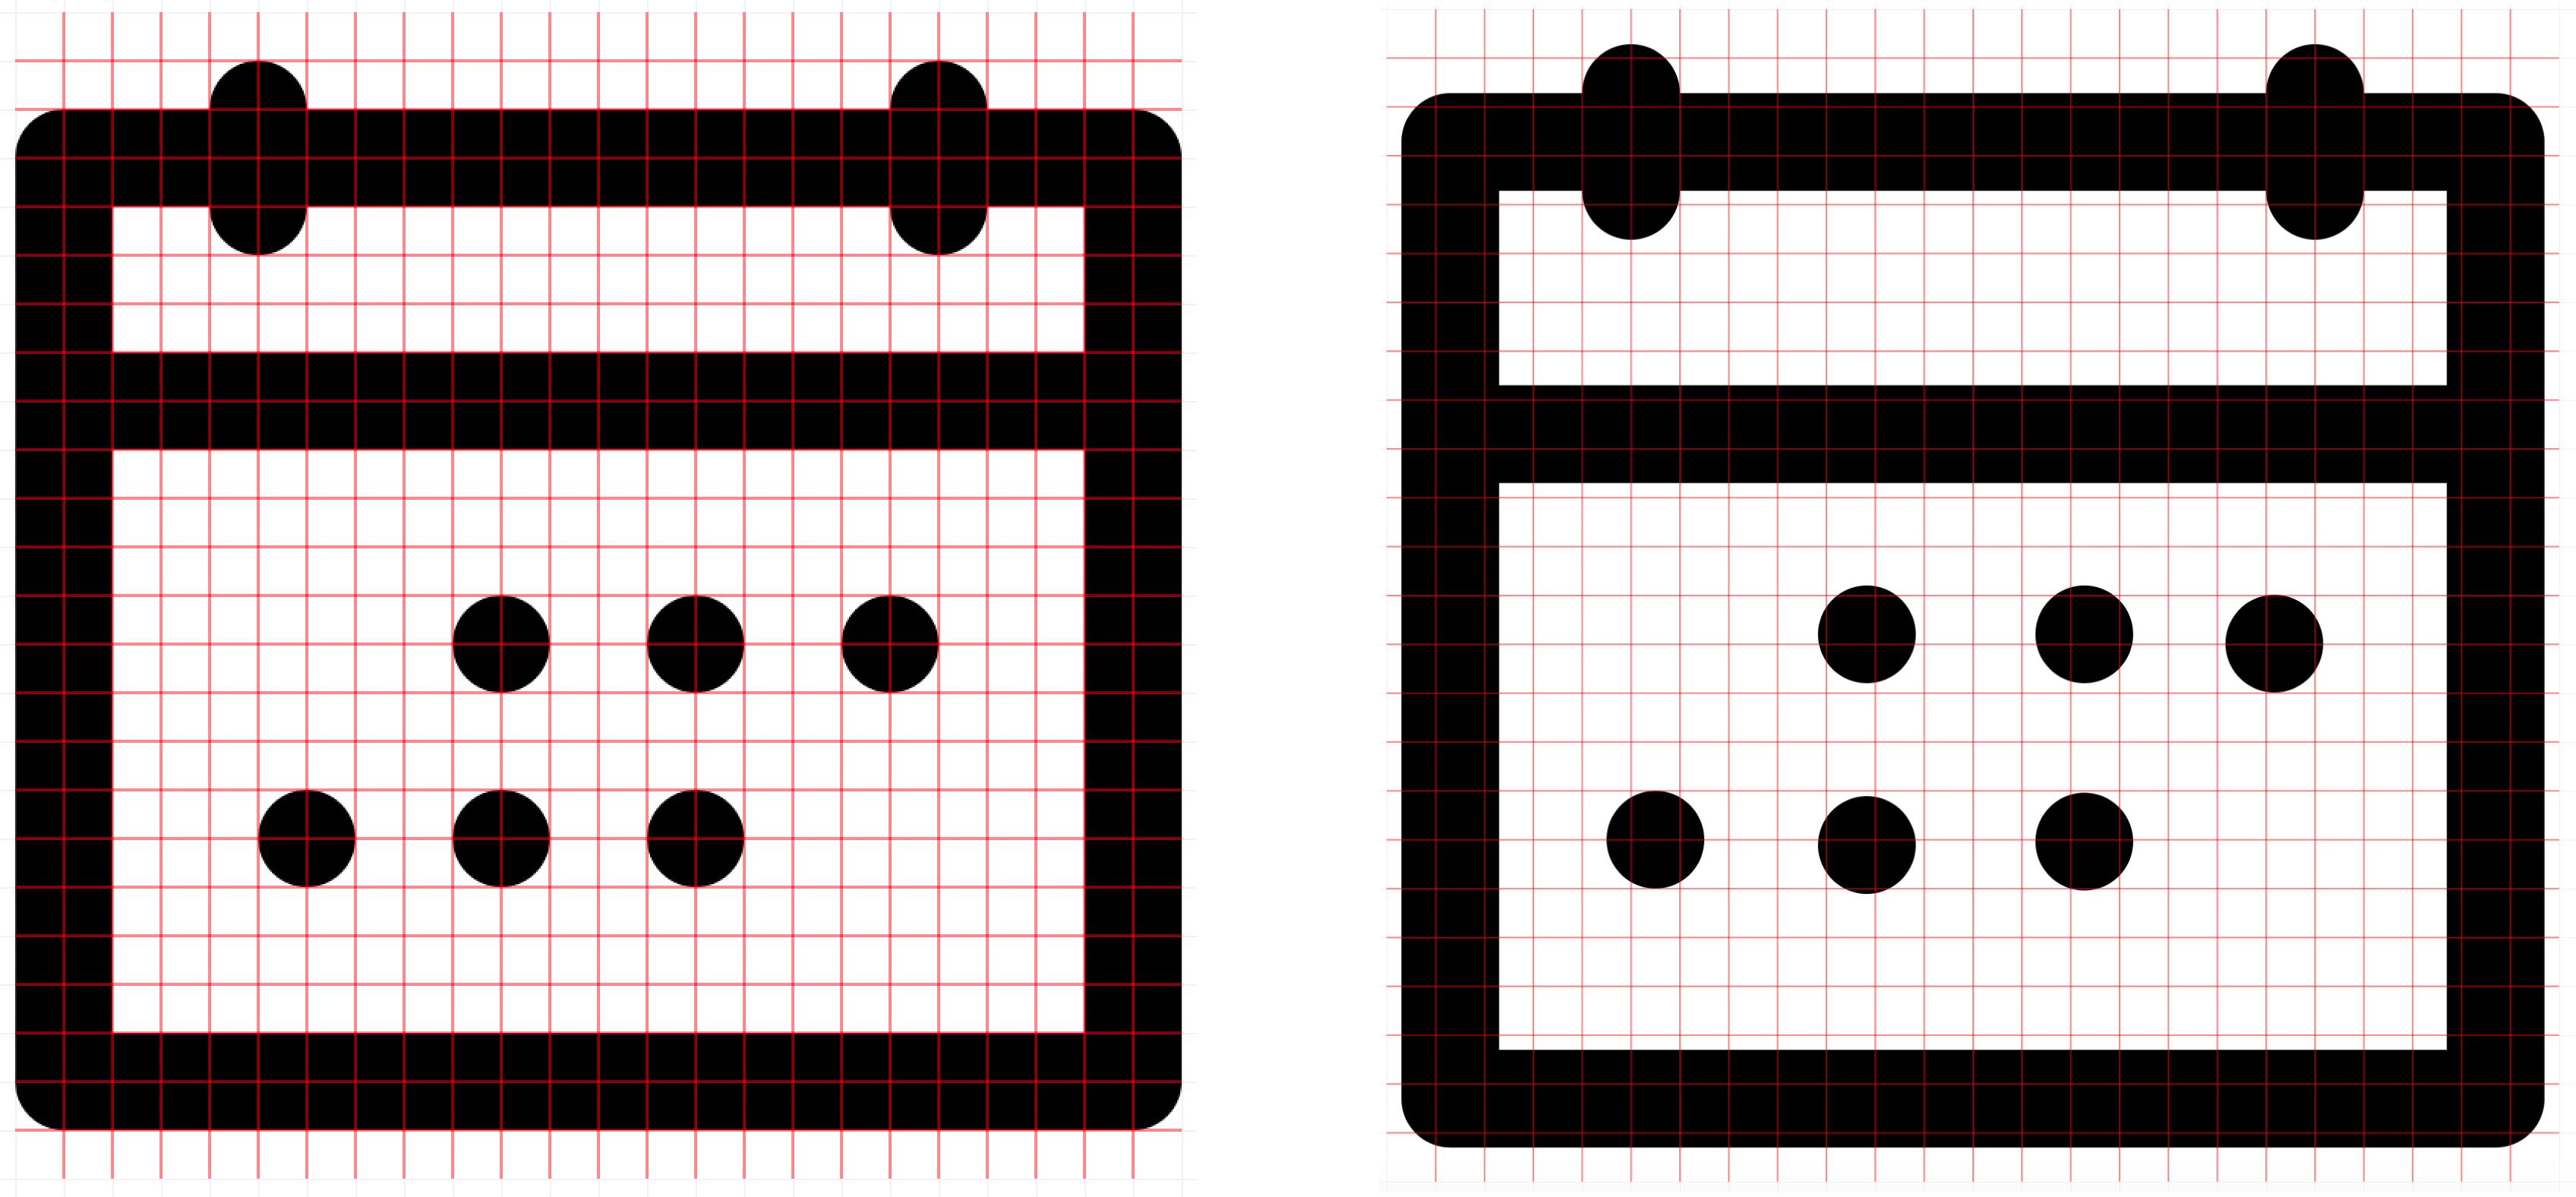
I like to build myself a grid before I start. Here are my settings in Figma.
Great! Now that you've mastered the pixel grid y'all'll want to larn nearly the optical grid. The optical grid helps us figure out where the eye of mass of the icon is, as well as how large it is perceived by the man center. Circles and curved objects accept upwards less visual space than squares. It is best to put your icons in a stock-still size container and then that they're all identical dimensions when exported. Calculation this intrinsic padding supports the optical/perceptive weighting without additional fussing in dev later on downward the line.
In edifice my optical grid, I like to give padding at the edge that's equal to my stroke weight, or possibly double if I'm using a 1px stroke. You can run across in the examples below how the different shapes go to the unlike edges of the grid.
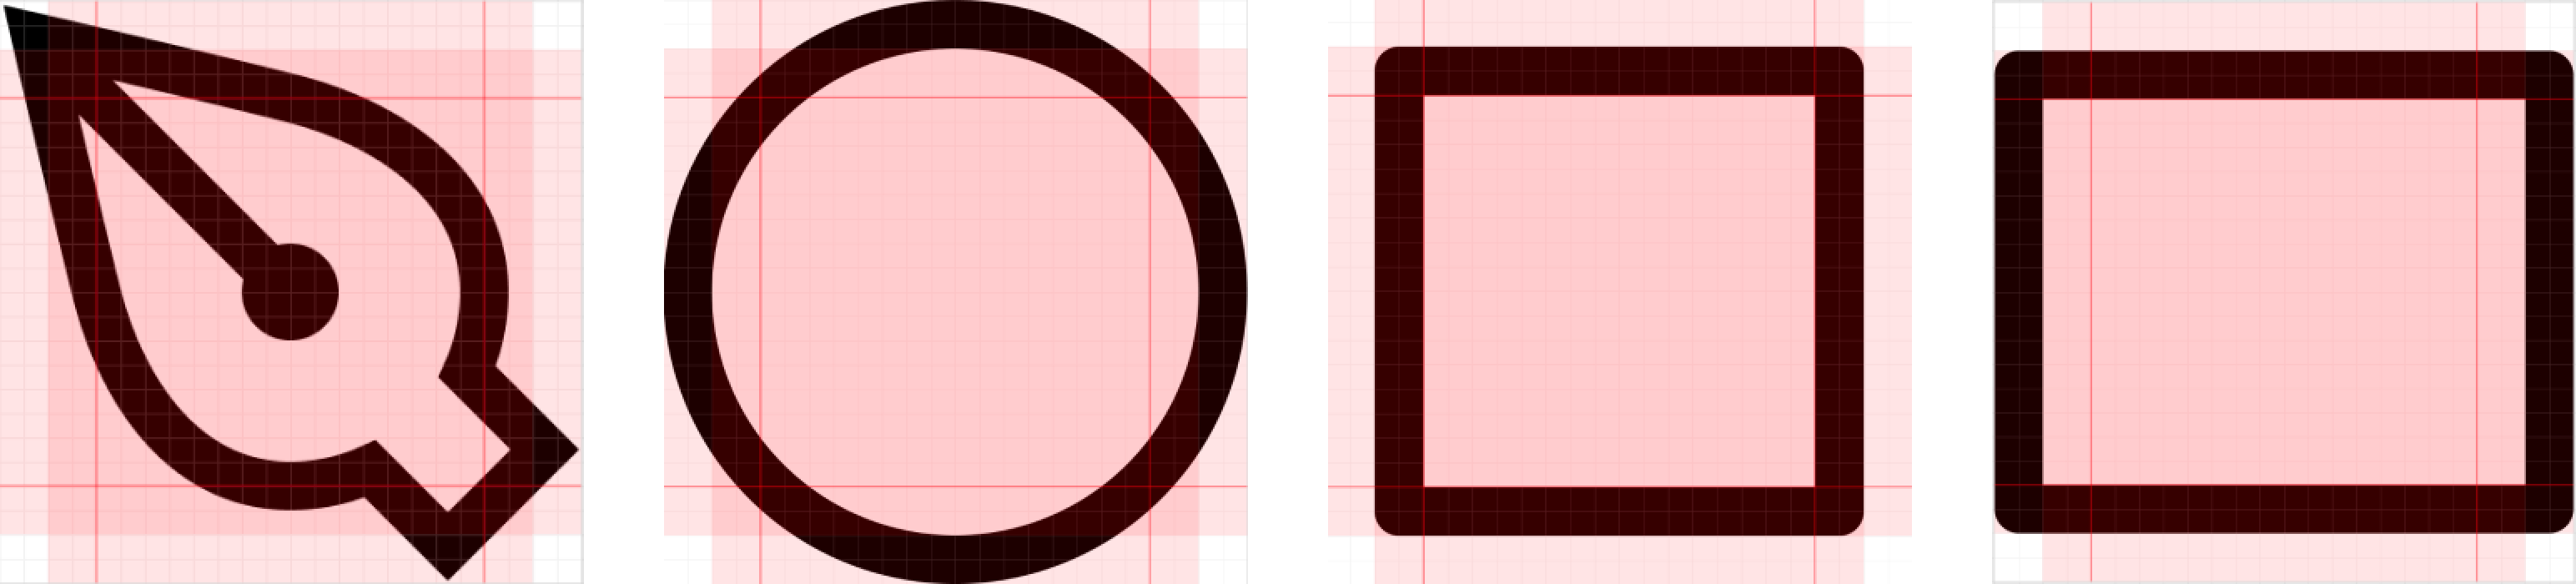
Visually, the dominant object should be centered both vertically and horizontally.

If you're using the pixel grid and taking advantage of the optical filigree, y'all're going to be streets ahead.
Strokes and fills
Think when I said consistency is key? I'm proverb it once more. Cipher bothers me more than seeing ii icons side by side where one is filled while the other is stroked. Making sure your icons are all styled the same way is very important. You lot might take use cases for applying a fill up to show something is selected, for instance, but you definitely want to create a gear up with i manner, and possibly create the other variant.
Typically, filled icons have college recognizability. Stroked icons requite you great power to create tiny details. When choosing which style is more than advisable, you lot should too consider your overall brand.
If you're going to create stroked icons, strokes all need to exist the same weight. I as well recommend that the space between strokes not exist thinner than your stroke weight.
Maybe you have an icon ready that fulfills 1 style, but not the other. When creating filled versions of stroked icons, y'all're going to desire to look at how yous can simplify the line work. Ideally, filled icons are like shadows, rather than inverted line-based icons. Creating stroked versions of filled icons involves determining what stroke weight you can fit in your infinite and what details y'all might add while maintaining clarity.
I do non recommend making stroked icons at smaller than 10px (assuming 1px-2px stroke weight). They volition be very hard to decipher.
Style choices
Your icons are a reflection of your make. When starting this work, it is of import to understand the core values of your make and how they manifest visually. Some adjectives to think about are difficult/soft, casual/formal, luxurious/economical, and literal/abstract. Y'all may have an illustration style you can reference.
Some icons seem like no-brainers (an X, a hamburger menu, a chevron), but these icons require you to have already figured out the bones tenets of your icon organisation. I recommend starting with harder icons (ie. more complex) to help you lot determine what rules yous want to instill. This manner, once you offset designing simpler icons, information technology will exist easy informal.
Here is a selection of both production and marketing icons that reflect the voice and tone of the company'due south visual brand:
- Uber
- Apple
- Airbnb
- Foursquare
Drawing icons
Geometric shapes
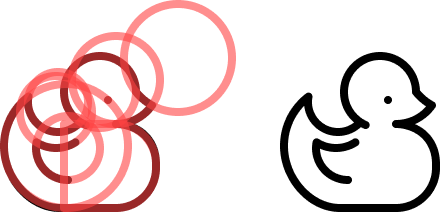
Unless I'one thousand creating a very natural, organic icon fashion, I like to start with basic shapes to create the forms of my icons. Rectangles, squares, and circles all give y'all great starting points to create more than polished icons.
When drawing geometric forms, if you need to make complex polygons, you can either start from a square or rectangle, or yous can use the pen tool to go from point to on pixel. When doing this, it is extra important to have a clear grid and then you can encounter where those points are going.
When you demand to draw angled geometric shapes, I do non recommend simply using a rectangle and rotating it. Instead, utilise the pixel grid to draw your angled rectangles.

Natural forms
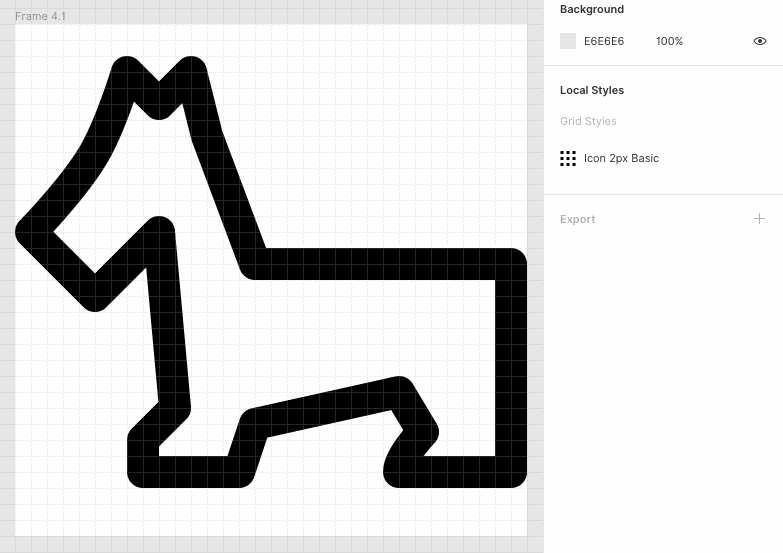
Drawing more natural forms in Figma is easy. Y'all can either apply the traditional method of drawing curves indicate by point, or y'all tin use Figma's splendid point corner radius tool. I like to draw all my points equally direct lines so round the corners with the corner radius tool. This tool is very helpful for creating organic, counterbalanced shapes. Because Figma'southward corners automatically adjust, you can move effectually those points and the corners will adjust for you lot.
Corners/Joins
There are a couple of options for corners: mitered (square), beveled, and rounded. I highly recommend you stick with one fashion for your icon set.
Corner radius
When using this for rounding squares and rectangles, you want to brand certain all your corners have the aforementioned radius. When creating concentric shapes, you'll demand to adjust your corner radii to create the perfect concentric shapes. Interior shapes will have a smaller radius than exterior shapes.
Whatsoever intermediate point on a path can exist rounded via the Corner Radius property in the Inspector. If you lot select the unabridged path, information technology rounds all corners to the same degree. If you get into Edit way, you can select individual points and circular them separately.
End Caps
End caps can be rounded or squared. Stick with one option.
Filled objects
When your icons require filled objects within their main forms (like a window in a house), you lot'll ideally want to keep stroked shapes in stroked icons. And filled objects in filled icons. When you don't accept infinite for stroked shapes, you want to use filled shapes that are proportional to your strokes. For instance, if you accept a stroke weight of 2px, you don't want filled shapes that are bigger than 4x4px.
Metaphor
Metaphors are of import in icons - nosotros use them all the fourth dimension without even thinking. An icon of a house means homepage. An insect means an error. When scaling icons to create smaller versions, I like to keep the metaphor I'm using in listen to communicate the icon's message.

Perspective
Using perspective in icons is catchy - their size makes information technology difficult since drawing with perspective takes up extra space. If you do desire to use perspective, either employ it widely and brand it a key part of your organization, or utilise it sparingly when it helps increase legibility and clarity.
Type (avoid!)
When possible, avert blazon in your icons. Icons are meant to be global. If you lot do need type (for instance, currency symbols), draw it yourself, rather than using a typeface.
Boolean Operations
Boolean operations combine whatever set of shape layers through one of four formulas: Union, Subtract, Intersect, and Exclude. This tool is live, and astonishing. It is a great way to make your icons more editable. Rather than having to cut paths, y'all tin apply the union feature. Don't desire to find the intersection of shapes by hand? Effort subtracting.
Boolean groups are treated as a single shape layer and share fill and stroke properties and tin can be combined with other boolean groups through subsequent boolean operations.
- Marriage: Union combines the selected shapes into a boolean group. If the objects overlap, the new shape's outer path consists of the composite of its sublayers' paths minus any segments that overlap. The stroke would then be applied to that outer path ignoring whatsoever path segments which overlap each other.
- Subtract: Subtract is the contrary of Union. Subtract removes the surface area of a shape or set of shapes from a base shape. Simply the bottom shape layer is solid, the residue are subtracted from information technology.
- Intersect: Intersect creates a boolean group whose shape consists only of the overlapping parts of its sublayers.
- Exclude: Exclude is the opposite of Intersect. Exclude shows only the areas of its sublayers that do not overlap.
Once I'm finished with an icon, I like to create a union (if it isn't one big path already), and then that when futurity designers are adjusting the color, it is piece of cake to just modify one holding (the fill) instead of fills and strokes.
Vector Network
Vector networks are 1 of the most unique features in Figma. Nigh pen tools draw paths in a loop with a defined management, ever wanting to reconnect to their original point. Vector networks do non have a direction and can fork off in dissimilar directions without requiring a separate path object to exist created. Complex objects tin can then exist created inside the same object and with the aforementioned backdrop much faster than they could be fatigued using traditional vector path tools. For more than on this, visit this article.
How to apply icons in a pattern system
Making your icon set accessible to the rest of your team is a thing of system, asset management, and awareness.
System
Let's start with file naming. Your icons should be named based on what they prove, not what they represent. For example, a stopwatch icon should be named stopwatch, not speed. A lightbulb should exist called lightbulb, not idea. You want to make instantly articulate to people what the icon is, not what it communicates on a more conceptual level. Shorter names are better, besides. When you need multiple words, use a nuance to separate them.

Eventually, y'all'll turn all your icons into components. In Figma, components works just like frames, with the twist that duplicates of a component create new instances rather than copies. This means you can accept a giant library of all your icons and when you need to use one, y'all create an instance from the library. If someone makes changes to the original, your icons will nevertheless exist up to date. You can search these assets, then you may want to add information that is searchable. Merely rather than putting it in the file proper name, there is an alternative. Figma has a component description box which allows you to add tags and keywords. This is a great place to add all those phrases people might be searching for in your library without making crazy long, complex names. This is where those product values go!
To aid your engineers, yous'll desire to make utilise of both frames and pages. Pages correspond the outermost group (and then I similar to sort those by size). Frames then aid y'all narrow your content, as in the example below. This icon's naming system goes size > category > file proper noun.

When yous have the aforementioned icon with variants, hither's how I similar to handle them.
Unlike sizes: Use different pages since yous volition rarely exist switching directly from one case to another.
Filled vs. stroked: If yous are using both styles, use a slash after the icon name to point filled or stroked icons.

Adjusted imagery: When you take an icon with a visual variant (for example, multiple currency variants), you can as well employ naming to help differentiate, using the same method every bit filled vs stroked icons.

Managing your assets
One time yous're done with your icons, you want them to be as clean as possible for the best possible export. Use boolean operations to simplify your piece of work (remember our friend Wedlock?). Avoid whatsoever extra lines or shapes. Cheque that all your lines autumn inside your frame. It is absolutely worth having some other person look at all your icons and double cheque for tidiness.
Figma is great considering information technology encourages collaboration and transparency. With icons, it tin can be tempting to let all your designers to accept edit access so they can add new icons. I recommend collecting icons individually, auditing them, and calculation them yourself when they are up to standard. Giving your colleagues view access (and access to your library) is enough to get them involved in what you lot're making without ending up with a cattywampus library and file. Some of your colleagues may want to create different versions of the same icon (in different colors or with different names, for case). This will often happen when someone associates an icon with a concept or product. You never want to accept more than than one version of each icon in your library. Utilize the component clarification for those names. Your swain designers should be adjusting icon colors in their private files, non in the main. Believe me, you'll have to make changes to these icons from time to time and you don't want to practice it in more than one place. File formats are key for when you're ready to export icons. If you're providing icons to partners outside of your design or applied science team, you're probably giving them .png files. Export at 1x, 2x, and 3x to conform multiple devices. For technology and design, you'll oftentimes be exporting .svg files which are editable in design programs and are drawn in the browser through code when rendered online on your app or site. When exporting SVGs, you'll want the cleanest possible code. Another peachy reason for choosing Figma is the hyper minimal SVG exporting. Considering they are optimized, it removes the need for further optimization downward the line. Check out this article to learn more than.
Getting your icons into the hands of others
Yous can exist the world's greatest icon designer, but if you tin't go your icons implemented in your app/webpage/direct mailer, it won't do any good. Earlier yous start designing, talk to the applied science squad responsible for getting these into product. They will be able to give yous data about the website or app infrastructure which volition bulldoze some of your choices, like stroke weight or size. Ask other designers what has been done in the past to make sure you're not duplicating work. Effigy out from your PMMs what additional icons they take been yearning to see. Be the friendly coworker who asks people for feedback, advice, and help. It volition give you a meliorate thought of what you should be making, so you aren't redoing piece of work, or ignoring fundamental tenants other people already figured out. And when you're ready to implement with your developers, endeavor using Figma'south API to programmatically consign.
Other resource
- Feel complimentary to attain out to Bonnie Kate Wolf at bonniekatewolf@gmail.com
- I dearest thenounproject.com → this place has tons of inspiration for unlike ways of looking at the same subject (who knew there were and then many means to depict a file binder!)

Source: https://www.designsystems.com/iconography-guide/
Posted by: saezawaseen.blogspot.com
0 Response to "How To Scale Up A Drawing Without A Grid"
Post a Comment